
XOD: VISUAL PROGRAMMING FOR BIOMAKER
XOD is open source software development environment that can be used to programme the Arduino microcontroller board. It uses a graphical interface that represents hardware and computing elements as nodes that can be wired together to allow data flow between the objects. XOD allows a hierarchical and dataflow driven approach, avoids the complexities of text management and syntax, and can be used to directly programme Arduino boards. We think that this provides a simple way for non-programmers (i.e. biologists) to develop useful skills and understanding - without needing to deal with the complications of programming languages and syntax. We have chosen XOD as an accessible tool for Biomaker training and device development. The software can be downloaded from: (https://xod.io).
The XOD IDE (Integrated Development Environment) available in two different formats, a desktop client and a web-based client that you run in your browser. We generally use the desktop IDE. Both implementations have similar appearance and functionality, but the desktop version allows compilation on a local computer without quota limitations. There are versions of the desktop IDE for Windows, Mac OSX and Linux.
“XOD allows syntax-free programming of devices for the biology lab and the field...”
Patches, Nodes and Links
The first time you open up either the desktop or web-based IDE a default project called “welcome-to-xod” will be opened. This introductory project provides a series of tutorial “patches” (see below). A patch is the working area for a XOD program. It is similar to a “sketch” in the Arduino IDE, but instead of text code - the patch is built with “nodes”, which are the basic elements in a XOD program.
A node can represent many different things: an electronic component like an LED, a sensor like the LM75 temperature sensor, a logic function like AND, OR or NOR, a pulse source like a Square Wave or Sine Wave generator, a mathematical function like multiplication or addition, a conversion function like metres to feet or a Boolean function. Each node is represented by a rectangular box that has one or more circular connections on the top and bottom. These connectors are called “pins”.
“Input pins” are located on the top side of each node, while those on the bottom are “output pins”. The pins on a node are like variables and can contain parameter values. The values can be left at their default values, or selected and set using the “Inspector”, or receive new values via connection to the output pins of other nodes.
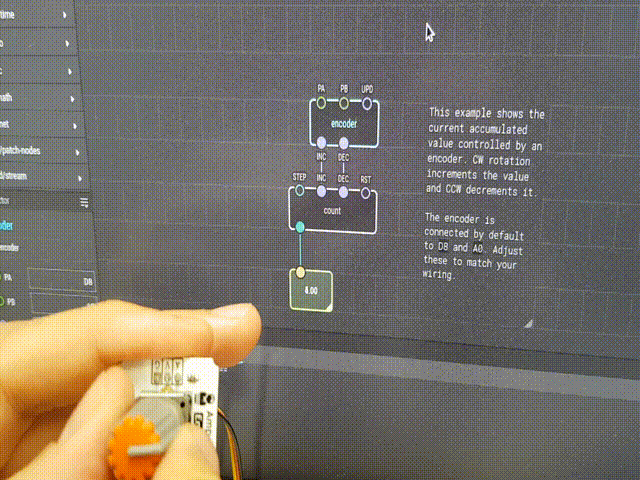
Image from: https://forum.arduino.cc/index.php?topic=572630.0
The pins on a node can have different data types, represented by colors.
Green Pins represent numbers.
Blue pins represent pulses.
Violet pins represent boolean values.
Orange pins represent strings.
A XOD program consists of nodes connected together in one or more patches. New nodes are selected in the Project Browser, and dragged onto the patch area. If you know the name of the node you want to add, you can double-click on a blank area of the patch or press the ”i” key on your keyboard. This will bring up a search box where you can type in the name of the relevant node. If the search is successful, highlight the node in the results and hit “enter” to put the node onto the patch.
In XOD “Links” are the lines used to connect nodes to each other. A link runs from an output pin on one node to the input pin on another node.
You create a link by clicking on a pin on one node, this created the starting point of the link. You then drag it to another pin on another node. You can start creating a link by clicking on either an input or an output pin.
XOD is smart and won’t let you link a pin to another pin if it doesn’t make sense or if the data types are incompatible. The link color is determined by the data type of the output pin in the link.
Linking nodes is a lot like wiring elements in an electronic circuit. In fact a XOD program really looks more like a wiring diagram than anything else.
Project Browser
The Project Browser is a section on the top left side panel of the XOD IDE. It essentially allows you to manage all of the patches in your project and to add nodes. It consists of the following sections:
Project Patches – A list of all of the patches used in your project. You can open, rename or delete each patch or even drag it onto another patch.
Custom libraries
xod/bits - Low-level bits and bytes operations
xod/color - Library to work with color
xod/common-hardware - Hardware drivers for popular and simple peripherals
xod/core - The very basic nodes of XOD
xod/datetime - Date and timestamp operations
xod/debug - Debug nodes for XOD
xod/gpio - Nodes of XOD to deal with GPIO (hardware pins)
xod/i2c - I²C (aka I2C, IIC, TWI) bus interfacing
xod/math - Nodes of XOD for basic mathematical operations
xod/net - No description
xod/stream - No description
xod/uart - Provides constructors and Nodes to interact with UARTs (Software, Hardware, USB) in XOD.
xod/units - Units of measurement conversions
xod-dev/ds-rtc - This library operates DS1302/DS1307/DS3231 based breakout RTC boards
xod-dev/esp8266 - Support for ESP8266 as a slave module
xod-dev/esp8266-mcu - Support for ESP8266-based MCUs.
xod-dev/pn532-nfc - Support for RFID/NFC modules based on a PN532 chip.
xod-dev/sharp-irm - Nodes to read analog infrared range meters by Sharp (GP2Y0A) and convert the signal to distance values.
xod-dev/w5500 - Support for ethernet shields that use Wiznet W5500 chipset.
Inspector
The Inspector is located on the bottom left side of the XOD IDE. It allows you to view and modify the properties of nodes. If you highlight a node the Inspector will display its current properties. Each pin in the node will have a property. You can modify the properties of most input pins if they are unconnected. If a pin is connected to the output of another node then the pins property will be controlled by that node and you won’t be able to modify it. You can rename a node so that it makes sense in your project. This is useful if you have several nodes of the same type, for example several LED nodes. You can also add a description to each node if you wish.
Quick Help
The Quick Help section is on the top right of the XOD IDE. By default it is hidden but you can toggle it on by clicking on the “question mark” icon in the top right corner. Quick Help gives you information about the highlighted node and its pin functions and data types. It’s very useful and I would recommend keeping it open at all times. Between the Inspector and the Quick Help you can usually get enough information to work with any XOD node.
Introduction to XOD
There are variety of introductory lessons for XOD, available at: https://xod.io/docs/tutorial/ - an example is shown right.
Simply install the cross-platform XOD software, assemble and plug in the hardware, and you can get started directly. In addition to these introductory exercises with minimal hardware, we will be running sessions with extended componentry, that we will build on during the training course.
These tutorial exercises can be run outside of the Biomaker training sessions - to give a fuller range of experience with the programming interface and nodes. The required hardware can be found in the Starter Kit.
Advanced tutorials at the xod.io website
A XOD tutorial library with basic patches can be found at https://xod.io/docs/tutorial/ (some of these may require adjustment of parameters for use with the multifunction Rich UNO R3 board provided in the Biomaker Starter Kit).
In addition, an excellent collection of hands-on hardware-software tutorials that can be found at the XOD website (https://xod.io/docs/guide/). These are summarised below. The same web page also includes details of Interfaces and protocols: Controlling LEDs via UART — exchanging text-based data between two boards, I²C communication basics, IoT and Network communication: Quick setup of W5500 Ethernet Shield for Internet and LAN communication, Advanced setup of W5500, Connecting to Internet with ESP8266-based MCUs, Fetching data from web API’s with HTTP GET requests.
Digital clock
A tutorial that descibes the use of XOD nodes to conbine a real time clock (RTC) module and I2C 16x2 LCD text display to create a digital clock. The tutorial exercise is easily translated to the Rich UNO R3 board and Starter Kit, with access to the onboard RTC, expansion shield and external I2C 16x2 LCD display. The tutorial provides a detailed description of the software and hardware components - and is especially useful for its clear description of the way patched nodes can be encapsulated in a single new node with particular inputs and outputs - and embedded in another patch. This allows functions to be embedded in a modular and reusable way - and can shield users from underlying complexity.
This example describes how to use the datetime and ds-rtc libraries, format date and time values, and work with real-time clock (RTC) modules for Arduino. Upon the completion of the guide, you learn how to create a simple digital clock based on a DS1307 I2C RTC module and I2C LCD display.
In this example, the programming process consists of two steps:
(i) Making a program to write the current datetime to the memory of the RTC module. (ii) Making a program to read the current datetime from the RTC module and display it on the screen.
The instructions and code can be found at: https://xod.io/docs/guide/rtc-example/
Required hardware:
Arduino Uno board e.g. Rich UNO R3
I2C RTC breakout board based on the DS1307 microchip
I2C LCD 16x2 display
A battery to power the RTC module
Expansion shield or breadboard
Hook-up wires
Experiments:
(i) Reformat the time display
(ii) Direct the output to different displays, ie. the onboard 4-digit display or 4D Systems touchscreen display

Data logging
This tutorial describes how to store sensor data and process it on a computer. The example shows how to read environmental temperature and save the values on a microSD card. After this, the microSD card can be connected to a computer to analyze the measured sequence of temperature values.
The example employs a TMP36 based thermometer, but XOD also supports the LM75 temperature sensor that is installed on the Rich UNO R3 board. The LM75a-temp-sensor node can be found in the gst/lm75atempsensor XOD library, and can be added to the patch. The LM75 thermometer is connected via an I2C port.
Note: there is more information about use of the Rich UNO R3 RTC and LM75 devices in XOD in Tutorial 3.
The temperature readings are bound to timestamps when read, using a system-time node. This node outputs time in seconds passed since the program start. A count node is used to number each new record for the continuously updated data. We need to set a frequency of readings to limit the data volume and to give some time for the microSD board to flush the file after each record. The easiest way to do this is to use a clock node.
With a potentially large volume of data, the stream can be formated as a table. Each row may represent a single record: the record number, record timestamp, and a temperature value read at that moment. To combine all data values and store them as a single string, use the join node. XOD provides an sd-log node to append text lines to the tail of the specified file stored on an SD card.
The program can be uploaded to the Arduino board and optionally powered by battery/solar cell. The program will be held in non-volatile memory, and the device will continute logging whenever powered, and despite any interruptions due to power loss. With the microSD card, you can store a significant amount of data that would not fit in the memory of the controller.
The instructions and code can be found at: https://xod.io/docs/guide/sd-log-example/
Required hardware:
Arduino Uno board
LM75 digital temperature sensor
microSD breakout board
Formatted microSD card
Breadboard
Hook-up wires
Experiments:
You can use any other sensor or even several different sensors to log and observe a processes of your choice.

Control of sequences: traffic light
A traffic light is a good example of a device which does its job sequentially. In its simplest form a traffic light has three states: Green — go, Yellow — stop if you can and Red — stop! Each state is active for some time interval and when done everything starts from the beginning and repeats again and again.
The tutorial describes the implementation a state machine. In this example there is one patch node per state and a patch that will wire the state nodes together. In this case: (i) state-green, (ii) state-yellow, (iii) state-red and (iv) main joining patch.
Drafts are crated for all state patches, the main patch is built, and then finalised. A mechanism is needed to allow patch nodes to talk to each other. A common mechanism is to send a pulse input to a state patch to enter that state, and add pulse outputs to notify about state completion. Therefore, each of the states has an input and output. We can wire them in a daisy chain so that when one state completes its job, it gives the control to the next state.
What should a state do once entered? When should it exit? What should it do right before exit? In this case, when a state is entered, it should turn on the corresponding LED. Then it should wait few seconds, turn the LED off and then exit.
A pulse from a boot node is used to trigger entry into the first state, as we want our traffic light to start its job right when the device is powered up. However, the device suspends after the last state because nothing returns it back to the first state. We could link the last state DONE pulse to the first state SET pulse to complete the loop, but unfortunately, XOD does not allow this - to avoid possible deadlocks. Instead we can add a defer node. This can break any cycle and tell XOD to break off if a deadlock occurs. The first state-green node input is not allowed to have links from the boot and defer-pulse at the same time. We can easily solve it by adding an any node.
Doing things sequentially in XOD requires the following approach:
(i) Understand your sequence states
(ii) For each state make a patch node
(iii) On each state patch, use pulse inputs and outputs to enter and exit the state
(iv) Make a joining patch which wires all states together
(v) Define an entry pulse for the first state
The instructions and code can be found at: https://xod.io/docs/guide/simple-traffic-light/
Experiments:
Play with timeout values, try to start the sequence from another state, add three more LEDs to form a complementing traffic light.
Required hardware:
Arduino Uno board
Onboard TMP75 I2C temperature sensor
microSD breakout board
Formatted microSD card
Breadboard
Hook-up wires
Marco Aita and Carlos Lugo have rewritten this for use with the shield and RGB LED.


Modules and Libraries
In this page, you will find a breakdown of the Biomaker Starter kit, and the accessible XOD libraries available for each part. The Kit is composed of a Rich UNO board and several modules that you can plug into it. Using those modules with god requires using the patch that go with them. This page will help you find the right patches for the hardware modules in the starter kit.
Libraries native to XOD
A lot of the modules can be used with the libraries and nodes native to XOD.
COMMON-HARDWARE/LED
The Common-hardware/LED node communicates with LEDs. This node is therefore very useful to control the LED and the LED bar available in the kit. This node is fairly straightforward. The ‘PORT’ pod just has to be connected to the right digital pin and the ‘LUM’ pod has to be linked to a command that activates the light.
COMMON-HARDWARE/BUTTON
Same as the LED node, the Common-hardware/Button requires its ‘PORT’ pod to be connected to the digital pin in which you will plug your button.
This node can be used to control the starter kit’s ON/OFF switch or the Open smart TouchSensor. It also activates the TouchButtons integrated on the Rich UNO Board. The Board’s buttons 1-4 are connected to digital pins D3-D6 respectively.
Common-hardware/sd-log
The Mico SD card adapter can be controlled by the Common-hardware/sd-log node.
common-hardware/text-lcd-16x2-i2c
This code works with the open-smart LCD display.
common-hardware/pot
This node works with the Board Potentiometer (analog pin A0) or the Open-Smart slide Potentiometer.
xod-dev/servo/servo
This node will allow you to use a servo.
common-hardware/hc-sr04ultrasonic
this XOD-native node is to be used for distance sensing.
Analog and Digital Generic nodes
Contrary to the nodes presented above, we will here introduce more generic nodes, which means the they apply to many different kinds of hardware modules. First tough, we will introduce some basic electronics concepts. Feel free to skip this paragraph if you are comfortable with the notions of analog vs digital and if you are confident that you can identify which of the hardware parts are generating inputs or requiring outputs.
Analog signals are signals covering a continuous range, and whose number of possible values is infinite. Analog signals are the opposite of Digital signals, whose range are subdivided into discreet numerical values (digits). A metaphor for the distinction between the two is say a digital watch versus an analog watch (with hands). If I look at my digital watch for one minute, I may see it display 14:45 until suddenly it becomes 14:46. If I do the same on an analog watch, I will see the minute hand go over the infinite range of reads in between 14:45 and 14:46.
Most sensors in the kit are analog sensors which means that they provide measured values as continuous changes in voltage variations. Switches that go either on or off, or servos that turn to a discreet number of radians are digital, however.
Pulse-With-Modulation (PWM) is a way to translate analog signal into a digital signal that the micro controller can interpret and use. This is what allows you to dim the brightness of an LED with a potentiometer, even though a potentiometer is an analog input and an LED a Digital output.
Digital-write
Digital-write is a generic node that allows the Board to communicate with the outside. You can use digital-write to activate the Vibration Motor for example
digital-read
DigitalRead reads digital value and can be the starting point to either display, use or record those values. It is used with Digital sensors.
Analog-sensor or Analog-Read
Analog-Read is the same as digital-Read but for Analog sensors. In the starter kit, this node can be used with the Light sensor, the Thermometer, the Potentiometers, the Humidity sensor and the Voltage sensor.
Pwm-write
This node allows for the conversion of Analog signal to Board-readable Digital signal. It has to be used on the digital ports that support PWM, however : find D3, D5, D6, D9, D10 and D11
External Libraries
Adding external libraries in XOD is very simple and painless. To add external libraries, click on the “add library” button on the top left hand corner of the XOD window. Then type the library name in th research bar. One word of caution: the research bar will only find the exact name of the library, so make sure to avoid typos and don’t expect to find external libraries by typing generic components names in there. To find some new libraries, also check out the XOD website libraries page.
cesars/rich-uno-r3
Cesar Sosa has created a library to fit the biomaker kit’s components and the rich uno board. He developed a lot of nodes and examples. His library would be a good place to start for everything rich uno board-related.
marcoaita/malibrary
This library has both a node for the buzzer (pin D9 on the Board and external module) and the 7 segment 4 digit display (pins D10 & D11 and external module)
gst/lm75atempsensor
This library works with the temperature sensor of the board with the address 48h
The external spark fun temperature sensor will not necessarily work with this library, hence the usefulness of the analog sensor node presented above
gweimer/ir-remote
Gweimer developed a few nodes and examples to use the remote control and command the board. His nodes work really well and are uncomplicated but you will need to adapt his code a bit either in XD or in C++ if you feel technically apt, as the remote he used is not the same as the kit’s so there is a mismatch in what you press and what it is interpreted as.
Exploring XOD libraries
More libraries exist and are made available by the XOD community. You can browse the library here and find some nodes that may suit your specific needs.
Otherwise the XOD forum is a helpful place where members of the community can request more advanced users to build nodes for specific needs. You might try your luck there, or read on the next part to learn how to build your nodes yourselves.
Creating your own libraries
XOD has many resources to help its community create nodes that suit their needs.
The first step in learning how to make new nodes can be found in their ‘getting started’ tutorial here
Then, you can also create more specific and elaborate nodes for XOD in XOD or for XOD in C++ by following the appropriate tutorials.
Another good resource is the “Creating analog sensor driver nodes” tutorial that will help you fine tune nodes for your analog sensors.
Finally, Matt Wayland has written an excellent guide to coverting Arduino libraries for XOD: “Using class-based Arduino libraries in XOD”.
Index of XOD nodes
Bit-handling nodes: low-level bit and byte operations
Common hardware nodes: drivers for popular and simple peripherals
Core nodes: basic XOD nodes
GPIO nodes: dealing general purpose input-output (hardware)
I²C nodes: (I2C, IIC, TWI) bus interfacing
Math nodes: for basic mathematical operations
Net nodes: to manage network connections
Stream nodes: for one by one processing of byte sequences
UART nodes: to interact with UARTs (Software, Hardware, USB)
Unit nodes: for measurement conversions
Bit-handling nodes: low-level bit and byte operations
bcd-to-dec: Converts a packed binary coded decimal byte into a byte value in range [0, 99]
bitwise-and: Computes bitwise AND of two or more bytes. A resulting bit at a particular position is 1 only if corresponding bits of all inputs are 1.
bitwise-not: Computes bitwise NOT of a byte. Also known as complement. A resulting bit at a particular position is 1 when input bit at the same position is 0, and vice versa.
bitwise-or: Computes bitwise OR of two or more bytes. A resulting bit at a particular position is 0 only if all corresponding bits of inputs are 0.
bitwise-xor: Computes bitwise XOR of two or more bytes. A resulting bit at a particular position is 1 only if an odd number of corresponding bits of inputs is 1.
dec-to-bcd: Converts a byte value in range [0, 99] into a packed binary coded decimal byte
f32-to-number: Converts 32-bit IEEE-754 encoded floating point number presented as four bytes to a number. A result of the conversion will be in range between -3.4E+38 to 3.4E+38 with an accuracy of 7 digits. It means, a float number greater than seven digits in length will be inaccurate and lose a fractional part.
i16-to-number: Converts 16-bit signed integer presented as two bytes to a number. A result of the conversion will be between -32768.00 and 32767.00.
i32-to-number: Converts 32-bit signed integer presented as four bytes to a number. A result of the conversion will be between -2147483600.00 and 2147483600.00.
i8-to-number: Converts 8-bit signed integer presented as one byte to a number. A result of the conversion will be between -128.00 and 127.00.
number-to-f32: Converts a number to 32-bit IEEE-754 encoded floating point number presented as four bytes. An input for the the conversion should be between -3.4E+38 to 3.4E+38 with an accuracy of 7 digits. It means, a float number greater than seven digits in length will be inaccurate and lose a fractional part.
number-to-i16: Converts number to a 16-bit signed integer presented as 2 bytes. An input for the the conversion should be between -32768.00 and 32767.00.
number-to-i32: Converts number to a 32-bit signed integer presented as 4 bytes. An input for the the conversion should be between -2147483600.00 and 2147483600.00.
number-to-i8: Converts number to a 8-bit signed integer presented as one byte. An input for the the conversion should be between -128.00 and 127.00.
number-to-u16: Converts number to a 16-bit unsigned integer presented as 2 bytes. An input for the the conversion should be between 0.00 and 65535.00.
number-to-u32: Converts number to a 32-bit unsigned integer presented as 4 bytes. An input for the the conversion should be between 0.00 and 4294967000.00.
number-to-u8: Converts number to a 8-bit unsigned integer presented as one byte. An input for the the conversion should be between 0.00 and 255.00.
shift-left: Performs logical left-shift of `IN` by `N` bits.
shift-right: Performs logical right-shift of `IN` by `N` bits.
u16-to-number: Converts 16-bit unsigned integer presented as two bytes to a number. A result of the conversion will be between 0.00 and 65535.00.
u32-to-number: Converts 32-bit unsigned integer presented as four bytes to a number. A result of the conversion will be between 0.00 and 4294967000.00.
u8-to-number: Converts 8-bit unsigned integer presented as one byte to a number. A result of the conversion will be between 0.00 and 255.00.
2. Common hardware nodes: drivers for popular and simple peripherals
adxl335-accelerometer: Reads acceleration from an ADXL335 based sensor. Note that concrete ADXL335 instances differ from each other and their output should be adjusted for precise mesearument. By default the values are coarse although reasonable enough to determine shaking and approximate orientation. For an ideally factored accelerometer the outputs are in range ±3ɡ. Possible errors: — Invalid port
analog-sensor: Reads analog signal value from analog sensor. Possible errors: — Invalid port
binary-sensor: Represents a sensor which carries its signal through a single pin and is either high or low. The switches are expected to be instant, without bouncing involved (e.g., a binary line sensor, capacitive touch sensor, pyroelectric infrared motion sensor).
button: Reads a generic button or another mechanical switch. It is expected that the button is low while pressed, the on-board pull-up resistor is enabled if possible. The node provides signal debounce with 20 ms settle delay. Possible errors: — Invalid port
ds18b20-thermometer: Reads temperature from a DS18B20 sensor. Expects single-drop bus setup, i.e. one thermometer on a port. Possible errors: — Invalid port — Initialization sequence error
h-bridge-dc-motor: Drives a DC motor through H-Bridge IC such as L293 or L298. Possible errors: — Invalid port
led: Drives a generic single color dimmable LED. The conversion between luminance and LED power is biased so that change in brightness on range 0…1 is percepted more or less uniformly by a human. Possible errors: — Invalid port
mechanical-switch: Represents a switch which suffers from bouncing when engaged or disengaged (e.g., reed switch, push-button, mercury switch, bumper switch, rocker switch).
pot: Reads values from a generic potentiometer. Basically a thin wrapper around `analog-input` for a simpler learning experience. Possible errors: — Invalid port
pwm-load: Represents some actuator connected directly to a pin or through a BJT/FET/SSR which supports PWM power adjustment (e.g. a pump, fan, DC motor, or lamp)
relay: Drives a generic relay module.
sd-log: Appends lines of text to a file on SD card. Possible errors: — Can't open a file — Initialization failed or no SD card — Can't write data to SD card
thermometer-tmp36: Drives a digital thermometer based on TMP36 IC. Possible errors: — Invalid port
3. Core nodes: basic XOD nodes
act: Pulses when `ACT` is `True` and one of the following happens: the data on `DATA` pin changes, program boot, `ACT` has changed from `False` to `True`. Use this node to convert a boolean value which denotes activity/enableness to discrete update action pulses which appear right at the moments when you should reflect the changes in incoming data.
add: Adds numbers
and: Outputs true if and only if all inputs are true
animation-segment: Animates a number making it run from one boundary to another with the given rate.
animation-unit: Animates a number making it run from 0.0 to 1.0
any: Pulses on output when any input recieves a pulse
branch: Routes an incoming pulse to either of outputs depending on condition
boot: Outputs a single pulse when the program starts
buffer: Permanently holds a single value
clock: Outputs pulses at regular intervals
concat: Concatenates (adds together) strings
constant-byte: A predefined single byte datum that never changes in runtime
constant-boolean: A predefined `true` or `false` value that never changes in runtime
constant-number: A predefined numeric value that never changes in runtime
constant-port: A hardware port value
constant-string: A predefined text string that never changes in runtime. Non-ASCII characters are encoded in UTF-8.
continuously: Continuously outputs pulses
continuously-pausable: Continuously outputs pulses, can be paused
count: Stores a number which gets incremented on each `INC` pulse.
debounce: Debounces a value. The `OUT` value would change only after a period of at least `Ts` seconds while which the input state `ST` has not changed.
debounce(boolean): Debounces a boolean value. The `OUT` value would change only after a period of at least `Ts` seconds while which the input state `ST` has not changed. The node is useful to fight signal bouncing of mechanical switches.
debounce(number): Debounces a number value. The `OUT` value would change only after a period of at least `Ts` seconds while which the input state `ST` has not changed.
defer: Allows to create feedback loops. Repeats a change of the input on the output right after the current transaction will complete.
defer(byte): Allows to create feedback loops. Repeats a change of the input on the output right after the current transaction will complete.
defer(boolean): Allows to create feedback loops. Repeats a change of the input on the output right after the current transaction will complete.
defer(number): Allows to create feedback loops. Repeats a change of the input on the output right after the current transaction will complete.
defer(pulse): Allows to create feedback loops. Repeats a change of the input on the output right after the current transaction will complete.
defer(string): Allows to create feedback loops. Repeats a change of the input on the output right after the current transaction will complete.
delay: Delays triggering of an incoming pulse by specified time
delta-time: Outputs time difference between the current and previous updates.
delta: Calculates difference between current and past input values.
divide: Divides two numbers
duty-to-time: Converts total time and duty cycle values into absolute on/off time values
equal: Outputs true if `IN1` = `IN2`, and false otherwise
equal(boolean): Outputs true if `IN1` = `IN2`, and false otherwise
equal(byte): Outputs true if `IN1` = `IN2`, and false otherwise
equal(number): Outputs true if `IN1` = `IN2`, and false otherwise
equal(string): Outputs true if `IN1` = `IN2`, and false otherwise
error: Raises an error when the `ERR` input pin receives the `True` value. Otherwise, the node passes the value from the `IN` pin to the `OUT` pin.
error(pulse): Raises an error when the `ERR` input pin receives the `True` value. Otherwise, it fires the pulse on the `OUT` pin when the `IN` pin receives a pulse.
fade: Lineary animates an internal value toward target value `TARG` with a rate `RATE`. Use the node to smoothen LED switching, motor starting, or servo angular position update.
flip-flop: Permanently holds either 0 or 1
flip-n-times: Generates `N` switches of output boolean signal. Useful to flash/blink/flip/switch something for several times in a row.
format-number: Transforms a number into a string with specified precision
format-progress: Outputs one of “...”, “OK”, “ERR” depending on the pulse which came last. Useful for demonstrating progress of a long-running process.
gate: Allows values to pass through only if EN pin is set to true
gate(boolean): Allows values to pass through only if EN pin is set to true
gate(byte): Allows values to pass through only if EN pin is set to true
gate(number): Allows values to pass through only if EN pin is set to true
gate(pulse): Allows values to pass through only if EN pin is set to true
gate(string): Allows values to pass through only if EN pin is set to true
greater: Outputs true if `IN1` > `IN2`, and false otherwise
has-error: Outputs `True` while the upstream node is in the error state.
if-else: Outputs either input value depending on condition
if-error: Outputs value from IN if it does not carry an error. Otherwise, defaults to value from DEF
if-error(pulse): Passes pulse from IN to OUT if it does not carry an error. Otherwise, pulses on error if the DEF pin received a pulse.
integrate-dt: Integrates input value over time
join: Joins multiple strings together inserting a delimiter between each pair. Useful for separating string parts with spaces and building CSV lines.
length(string): Calculates string size in bytes. Will be inequal to the number of glyphs if the input string is UTF-8 encoded and contains non-ASCII characters.
less: Outputs true if `IN1` < `IN2`, and false otherwise
modulo: Computes the remainder of `IN1` divided by `IN2`.
multiply: Multiplies numbers
nand: Outputs false if and only if all inputs are true
nor: Outputs true if and only if all inputs are false
not: Inverses a boolean value
nth-input: Selects either `X0` or `X1` based on `IDX` index value.
nth-input(number): Selects either `X0` or `X1` based on `IDX` index value.
nth-input(string): Selects either `X0` or `X1` based on `IDX` index value.
or: Outputs false if and only if all inputs are false
overrun: Delays changes of the `EN` value from true to false by the specified time. Switching `EN` from false to true acts instantly.
pad-with-zeroes: Transforms a number into a string and adds zeroes to the beginning of the string until it is W-sized. Ignores a fractional part of the value and a sign. If the width of a string for a number is greater than the specified W value, node produces a string with the untransformed number
pid-controller: A proportional–integral–derivative controller. Computes fuzzy output value based on an actual current input value and the desired value.
pulse-on-change: Emits a pulse every time input value changes.
pulse-on-change(boolean): Emits a pulse every time input value changes.
pulse-on-change(byte): Emits a pulse every time input value changes.
pulse-on-change(number): Emits a pulse every time input value changes.
pulse-on-change(string): Emits a pulse every time input value changes.
pulse-on-error: Fires a pulse when the upstream node enters the error state.
pulse-on-false: Emits a pulse on a falling edge, i.e. when `true` changes to `false`
pulse-on-true: Emits a pulse on a rising edge, i.e. when false changes to true
saw-wave: Generates sawtooth wave signal
saw-wave-map: Computes sawtooth function value
select: Outputs `X𝑛` value based on which `S𝑛` pulse came last. By default outputs the value of the latest `X𝑛` input.
sine-wave: Generates sine wave (sinusoid) signal
sine-wave-map: Computes sine wave function value. It’s a periodical function with range [0, 1] which starts from 0.
spread-error: If at least one of the inputs has an error the node raises an error on all outputs. If there are no errors the node passes input values through without changes.
square-wave: Generates square wave signal
subtract: Subtracts two numbers
switch-case: Outputs Yn value when the corresponding Xn equals IN. If IN is not found among Xns, outputs DEF.
system-time: Outputs time spent since the program start
throttle: Throttles input changes to happen no more often than once per interval specified. Useful to limit the rate of updates.
time-to-duty: Converts two absolute time values representing on and off time to a total duration and duty cycle values
timer: A simple timer/stopwatch
to-percent: Transforms a number to percent string. For example, 0.42 to “42%”
tri-wave: Generates triangle wave signal
tri-wave-map: Computes triangle function value
wait-all: Passes pulses through only when all `IN` pins received a pulse.
wait-all-once: Passes pulse only once when all `IN` pins received a pulse.
xor: Outputs true if and only if just one of inputs has true value
4. GPIO nodes: dealing general purpose input-output (hardware)
analog-read: Reads analog signal value from board ADC port. Possible errors: — Invalid port
digital-read: Reads digital signal value from board GPIO port. Possible errors: — Invalid port
digital-read-pullup: Reads a digital signal value from a board GPIO port with the internal built-in pull-up resistor enabled. It forces the resulting signal to be True if the wire on the port floats (is disconnected). Possible errors: — Invalid port
digital-write: Outputs high or low signal on a board port. Possible errors: — Invalid port
pwm-write: Outputs hardware-supported PWM signal on a board port. Possible errors: — Invalid port
5. I²C nodes: (I2C, IIC, TWI) bus interfacing
begin-transmission: Begins a transmission to the I²C slave device. Possible errors: — Invalid I2C address
end-transmission: Ends a transmission to a slave device initiated with `begin-transmission`. All bytes queued for writing with `write-byte` will flush at the moment of this node trigerring. Possible errors: — Data too long to fit in transmit buffer — Received NACK on transmit of address — Received NACK on transmit of data — Other error
i2c: I²C interface object constructor. Returns hardware I²C #0.
read-byte: Reads the next byte received from an I²C device after `request` succeeded. Possible errors: - Can't read byte
request: Requests N bytes from a given slave I²C device. Possible errors: — Invalid I2C address
write-byte: Pushes a byte to send queue. Possible errors: — No bytes written. Probably due to buffer overflow.
6. Math nodes: for basic mathematical operations
abs: Outputs absolute value of an input number
acos: Calculates arc cosine.
asin: Calculates arc sine.
atan: Calculates arc tangent.
ceil: Rounds a number to a minimal integer that is greater than the number
clip: Clips an input value so that the value is always inside a [MIN, MAX] range.
cos: Calculates cosine of an angle.
cube: Computes the cube (i.e. x³) of an input value.
discretize: Rounds input `X` up to the first threshold `T0`, `T1`, ..., `T𝑛` greater or equal to the `X`. If `X` is even greater than the last threshold, the value is round down to it.
floor: Rounds a number to a maximal integer that is less than the number
is-finite: Determines if the given number has a finite value, i.e., it is normal, subnormal, or zero, but not infinite or NaN
is-nan: Determines if the given number is a NaN value.
log-10: Computes logarithm of a number to base 10.
log-bx: Computes logarithm of `X` to base `B`.
log-e: Computes natural logarithm of a number.
map: Projects a number from one range to another preserving ratio
map-clip: Projects a number from one range to another preserving ratio. Then clips a result to the target range.
max: Outputs the largest of provided numbers
min: Outputs the smallest of provided numbers
pi: Provides math 𝜋 (Pi) = 3.14159265359
pow: Computes the power of `BASE` raised to the power exponent `EXP`
round: Rounds a number to nearest integer
sin: Calculates sine of an angle.
sqrt: Computes the square root of an input value.
square: Computes the square (i.e. x²) of an input value.
tan: Calculates tangent of an angle.
7. Net nodes: to manage network connections
format-http-request: Assembles HTTP request message
format-ip: Converts an IP address to a string
http-get: Performs an HTTP GET request and returns the response as a stream of characters
http-get-json: Performs an HTTP GET request and returns the response as a stream of parsed JSON chunks.
http-post: Performs an HTTP POST request and returns the response as a stream of characters
http-request: Performs an HTTP request and returns the response as a stream of characters
http-response-body: Skips response headers and outputs only the body. Raises error if response code is not 200.
ip-address: Assembles an IP address from 4 octets
ip-to-octets: Splits an IP address into 4 octets
mac-address: Assembles a MAC address from 6 octets
8. Stream nodes: for one by one processing of byte sequences
parse-integer: Read an integer number from a stream of characters. Stop when a non-numeric character was encountered
pass-if: Lets values pass through only if COND is true
pass-from-sequence: Lets characters pass through only after a specified sequence is encountered
accumulate-string: Creates a string from a stream of characters by appending each new character to the end of the string until the maximum capacity is reached.
pulse-on-sequence: Pulses each time when a specified sequence of characters is encountered
pass-until: Lets values pass through until the value specified in S is encountered
skip-until: Lets values pass through only after the value specified in S is encountered
9. UART nodes: to interact with UARTs (Software, Hardware, USB)
change-baud-rate: Changes baud rate of passed UART object. If UART already has started communication it will end it up and begin again with new baud rate.
end: No description
example-print: No description
example-uart: No description
example-write: No description
example-read: No description
print: Writes a string bytes per byte into UART. Possible errors: — No bytes written. Probably due to buffer overflow
is-available: Checks does UART have an available bytes to read
flush: Waits for the transmission of outgoing serial data to complete and then clears UART buffer.
read-byte: Reads one byte from UART. Possible errors: — Can't read byte
read-bytes: Reads all available bytes from UART one by one. Possible errors: — Can't read byte
soft-uart: Constructor of SoftwareUart, provides serial communication on any digital pins.
uart-0: Constructor of HardwareUart, provides serial communication through Serial.
uart: Constructor of HardwareUart, provides serial communication on default hardware serial ports.
uart-1: Constructor of HardwareUart, provides serial communication through Serial1.
uart-usb: Constructor of HardwareUart or UsbUart, that provides serial communication through SerialUSB.
uart-3: Constructor of HardwareUart, provides serial communication through Serial3.
write-byte: Writes a single byte in the UART. Possible errors: — No bytes written. Probably due to buffer overflow
uart-2: Constructor of HardwareUart, provides serial communication through Serial2.
10. Unit nodes: for measurement conversions
c-to-f: Maps temperature from °C to °F
deg-to-rad: Converts ° (degrees) to radians
m-to-cm: Maps meters to centimeters
m-to-ft: Maps meters to feets
m-to-mm: Maps meters to millimeters
m-to-in: Maps meters to inches
rad-to-deg: Converts radians to ° (degrees)
standard-sound-speed: The speed of sound in dry air at 20 °C (68 °F): 343 meters per second (m/s).